When you try to access particular directories or files in Windows 10 or 11, you get the message “access is denied.” There are various options for resolving this problem.
When Windows tells you that you don’t have permission to access anything on your own computer, it may seem bizarre.
We’ll walk you through the procedures to address access is denied warnings on Windows 10 while trying to open a file or folder. While we concentrate on Windows 10, the most of this advice applies to Windows 11 as well because the two are so similar.
1. Do you work as an administrator user?
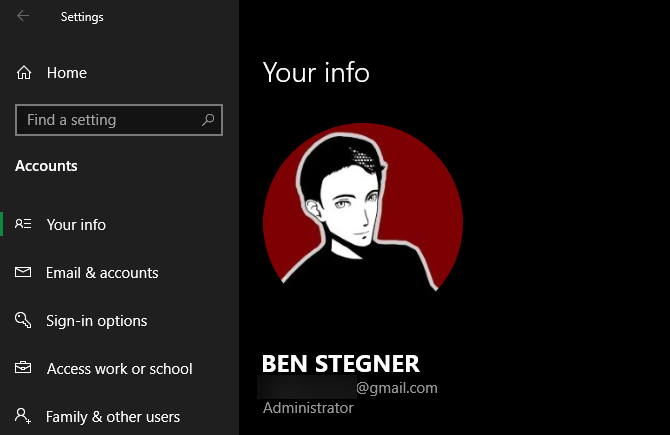
To change file/folder ownership, you’ll almost always need to be an administrator on your computer. You might be able to change permissions in your own directories, but you won’t have much power elsewhere.
This is done to keep everyone’s computer files confidential. Files that belong to another user can only be accessed by administrators. To make modifications to system files, such as those in the Program Files and Windows folders, you’ll also need to provide admin permissions.
If you haven’t already, see our guide on obtaining administrator access in Windows. Moving ahead, we’ll presume you’re an administrator. If you aren’t, speak with whoever controls your computer.
2. Take Ownership to Resolve Access Denied Errors
When you get in to a situation like this, you have to take ownership of the folder using File Explorer. This is how you can start doing it.
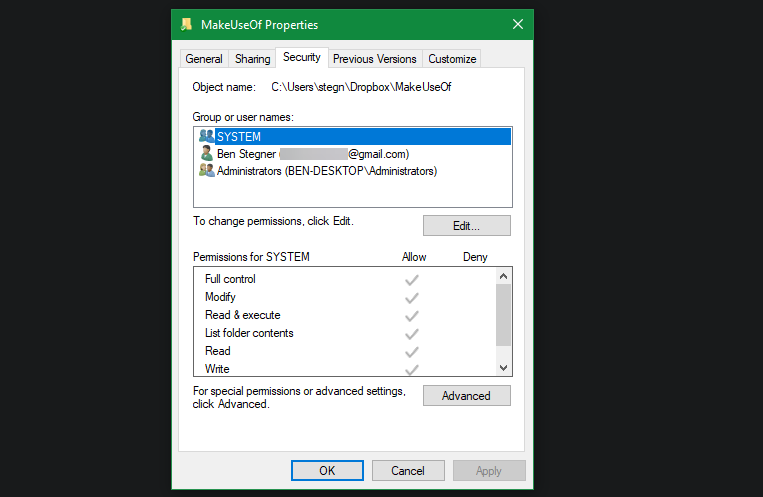
To begin, right-click the document in question, thereafter, select Properties from the drop-down menu. Switch to the Security tab in the resultant window. Then, for further possibilities, choose the Advanced button.
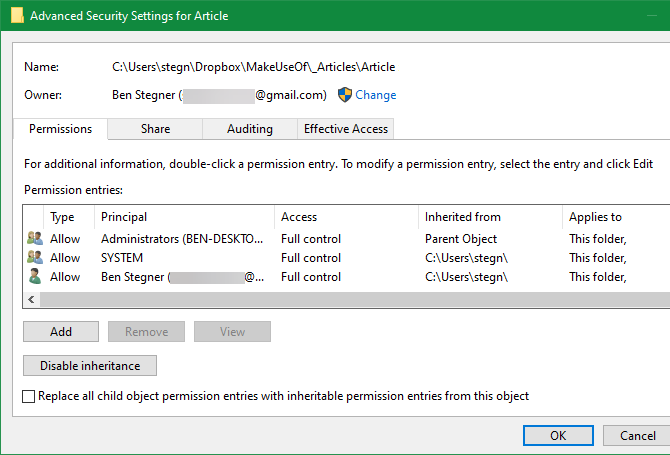
A field labeled Owner appears at the top of the following window. If you’re having trouble following this, it’ll most certainly say unable to reveal current owner. To repair it, click the blue Change link next to it—note that you must be an administrator to do so.
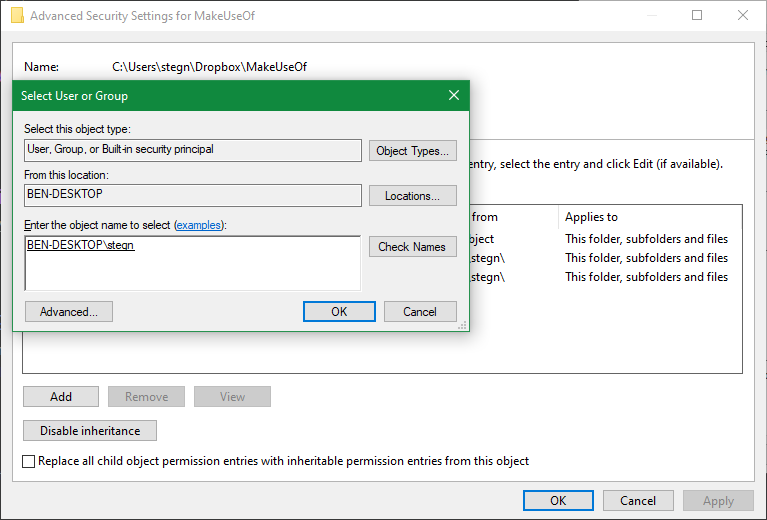
A dialog box labeled Select User or Group will now appear. Type the account name of the new folder owner in the Enter the object name to pick box. This can be a username for an account or a group of users on your computer.
Standard units such as Administrators (if you want all computer administrators to possess it) and Users are examples of groups (for everyone to own it). When it comes to residential use, it’s usually best to give ownership to just one individual.
Enter your username here if you want to take ownership of the folder using your own account. If you sign in to Windows with a Microsoft account, your username is the first five letters of your email address.
When you’re finished, click Check Names to double-check your work. If you are, it will change to [PC Name][Username] immediately. Click the OK button.
Returning to the main Advanced window, look for a box at the bottom that says Replace all child object permission entries…. Check this option if you want your modifications to affect all folders within the current one (which you presumably do in most circumstances). Then press OK twice more, and you’re done.
When changing file ownership settings, be cautious.
When dealing with problems like this, the owner can use caution when following the instructions above. Be certain not to take ownership of folders in system directories such as Program Files or Windows.
Because normal accounts aren’t supposed to be the proprietors of these directories, doing so will compromise your system’s security. They hold crucial Windows folders that should not be tampered with.
You may still access most of these directories by using File Explorer to go to them. You must first confirm admin permissions before viewing them without becoming the owner.
3. Examine the Permissions of the Folder
If gaining ownership of a folder doesn’t work, or if you’re an administrator trying to provide permissions to someone else, you should look at which users have certain permissions for the folder.
In the Properties box of a folder, open the same Security tab as before. You’ll notice a list of users and groups on your computer at the top. Select an entry here to see what permissions they have for this folder in the bottom panel. When you want to change the rights for each user, tap the Edit button.
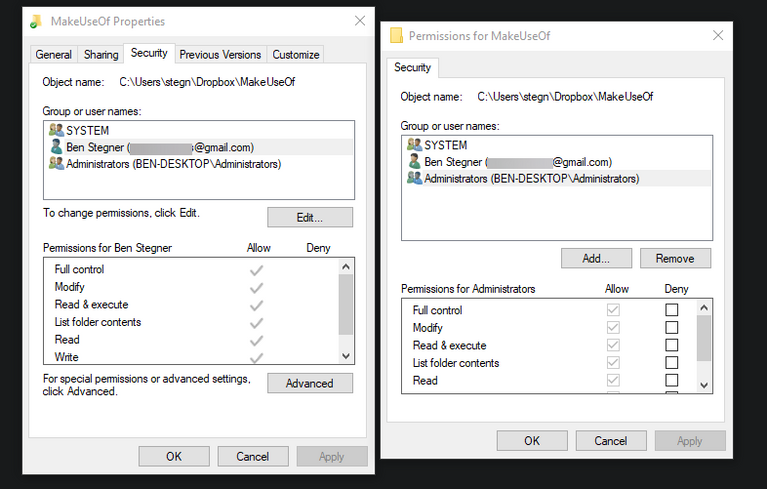
Full control, as the name implies, grants a user (or group) complete control over the folder and everything it contains. The read option is the most limiting, as it simply allows you to see what’s in the folder. For a more extensive explanation, see Microsoft’s page on file and folder permissions.
4. Make sure your antivirus settings are on point.
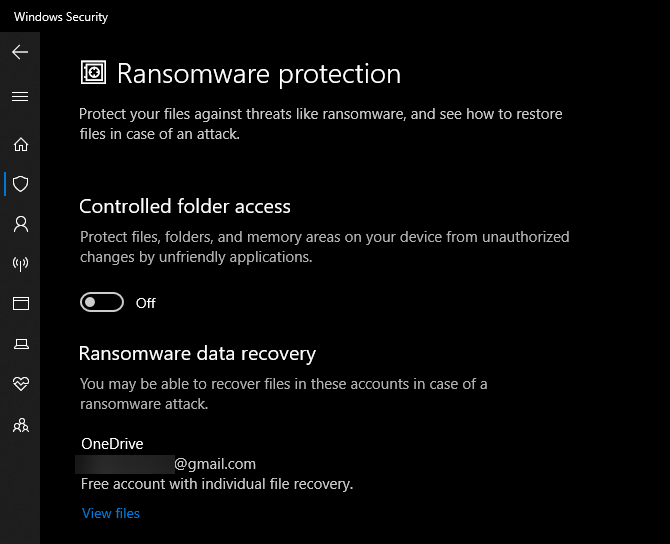
If you’ve verified that your file permissions are proper after going through the steps above, you should check your security tool next.
Look through the settings of your antivirus product to check if there’s anything like a file shield, ransomware protection, or something similar. Disable it first, then try to access the file again. If it doesn’t work, turn off your antivirus completely for a while and see if that helps.
5. Try Verifying whether the files are encrypted.
Another cause for the “access is denied” notice is that the contents of a folder are encrypted. Encryption, as you may know, protects a file by enabling only those with the key to read it.
Windows allows you to encrypt folder contents, however this feature is only available in Professional and higher editions. On the General tab, click the Advanced button in the subsequent window.
Check the box next to Encrypt contents to secure data. Everything inside the folder will be locked after this is done.
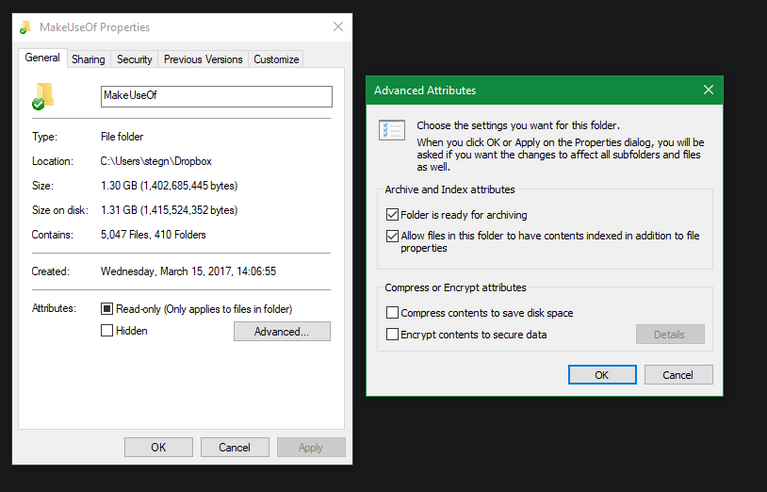
This sort of encryption is transparent, which means that the owner is completely unaware of it. They can access these files as long as they’re logged into the system. Solely, the person who encrypted the file will have to decrypt it.
This isn’t the only way to encrypt files in Windows 10 and 11, but it may be the source of the mistake.
Other Fixes that may be helpful for “File Access Denied”
The most essential remedies for the “folder access forbidden” problem in Windows 10 have been discussed. There’s a lot of advice regarding this problem floating around the internet, but not all of it is good. Some potential methods depend around obtaining administrative privileges, which we’ve already addressed.
Other advice may not work in every situation of similar cases, but it’s worth mentioning, just in case.
Disabling User Account Control is a popular strategy (UAC). To do so, go to the Start menu and search UAC, then select Change User Account Control settings. Click OK after dragging the slider all the way down.
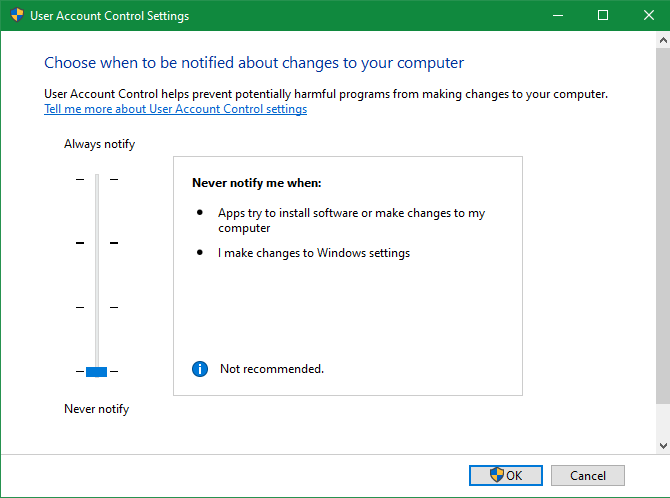
After you’ve done that, repeat steps #2 and #3 above to take responsibility. To keep your system safe, make sure to restore the UAC setting to its previous state.
Try booting your machine in Safe Mode and going through the steps to take ownership that way as another troubleshooting step. This eliminates the possibility of third-party programs interfering.
Finally, double-check that the folder or file you want to access isn’t in use by anybody else. Another process may have locked the file, preventing you from making any modifications. This is another problem that Safe Mode can help with.
Fixing this Error when you get “You Have Been Denied Permission to Access This Folder” and “Destination Folder Access Denied”
In most circumstances, you may resolve this by employing the same troubleshooting techniques as before. Regardless of the message, don’t try to fix the destination folder alone. Also, look at the permissions on the source folder.
Another variation of this message is “You have been denied permission to access this folder.” If the typical steps don’t work, go to #3 and be certain your account hasn’t been specifically refused permissions to that folder. If you see this for every folder, your Windows system or profile may be corrupted, and you’ll need to restore it.
Is it possible that you have been denied access? We’ll see what we can do about that.
We’ve tried our best to looked at how to fix “access denied” folder and file issues in Windows. Usually, it’s just a matter of changing permissions. Make sure you have administrator access before attempting to take ownership and making any necessary changes to permissions. Just make sure you don’t change the owner of any protected system folders, since this could jeopardize your system’s security.
When it comes to permissions, you should know how to lock down accounts in Windows so that they don’t have more access than they need.
