
Rooting SM G6100, specifically the Samsung Galaxy J7 Prime model, unlocks a world of possibilities for users who want more control over their devices. Whether you’re a tech enthusiast looking to explore your phone’s advanced capabilities, or you simply want to improve your device’s performance, the root SM G6100 process is something you might want to explore.
In this guide, we will walk you through the steps to root Samsung SM G6100 using the Odin tool. This powerful software developed by Samsung allows you to modify and customize your device safely and effectively. With the SM G6100 root, you have the freedom to install custom ROMs, remove pre-installed apps, and enhance your phone’s overall functionality. Brace yourself for a new and improved smartphone experience!
Read more – Why we want to root – Full Details with a guide
Table of Contents
The Pros and Cons of Rooting your Samsung SM-G6100

The world of Android customization is vast and varied, and one of its most intriguing aspects is the ability to root your device. If you’re contemplating whether to root Samsung SM G6100, it’s crucial to consider both the advantages and disadvantages that come with this process.
The Pros of Rooting SM G6100
Complete Control over your Device
The primary advantage of rooting SM G6100 is the degree of control it provides. Rooting allows you to access and modify the operating system’s underlying files, offering you the freedom to customize your device as per your preferences.
Boost Device Performance
Rooting has the potential to improve your device’s performance. With root access, you can remove bloatware that slows down your device, enabling smoother and faster operation.
Access to Special Applications
Rooting your SM G6100 can open up a world of possibilities in terms of applications. Several apps require root access to function, providing you with more options to explore.
The Cons of Rooting SM G6100
Risk of Bricking
One of the significant risks involved in rooting Samsung SM G6100 is bricking, which renders the device unusable. This is especially the case when using tools like Odin to root your device.
Voiding the Warranty
Another downside is that rooting your device typically voids the warranty. This means if your SM G6100 develops any issues after rooting, you’re on your own.
Security Risks
Rooting can open up potential security risks. It breaks the security model of Android, making your SM G6100 more susceptible to malware and hacking attacks.
Deciding whether to root your device is a personal choice that should be based on your specific needs and risk tolerance. Rooting can unlock a new level of customization, but it also comes with its own set of drawbacks. It’s essential to weigh the pros and cons carefully before deciding to root SM G6100 with the Odin tool.
How To Prepare For The SM G6100 Rooting Process
Preparing for the SM G6100 root involves several key steps to ensure a successful and safe rooting process. Here are the steps you should follow:
- Backup Your Data: This is a critical first step before any rooting process. Back up all important data such as contacts, text messages, photos, and other files you don’t want to lose. You can back up your data to your Google account, an external storage device, or a computer.
- Charge Your Device: Ensure that your device is sufficiently charged before starting the root process. It’s recommended to have at least 60-70% battery life to prevent the device from shutting down during the rooting process.
- Download Necessary Files: Download the Odin tool and the appropriate root file for your device version. Ensure these are downloaded from a reliable source to prevent any potential issues.
- Enable USB Debugging: This allows your phone to communicate with your computer. To enable it, go to ‘Settings’ > ‘About phone’ > ‘Software information’, then tap ‘Build number’ seven times to unlock developer options. Return to ‘Settings’ > ‘Developer options’ and enable ‘USB debugging’.
- Understand the Process: Make sure you understand the steps involved in the rooting process and the implications it carries. Remember that rooting your device can void the warranty and may potentially brick the device if not done correctly.
By following these steps, you can ensure you’re well-prepared for the SM G6100 root process.
Steps To Root SM G6100 With Odin Tool
Before embarking on the journey to root Samsung SM G6100, it’s crucial to prioritize the safety of your data. Given the potential risks involved in the rooting process, including data loss, the first and foremost step should always be to back up your data. Whether it’s your memorable photos, important contacts, essential messages, or any other valuable information stored on your device, ensure that you have a secure backup in place. This backup can be on an external storage device, your computer, or a cloud storage service. By doing this, even if anything unforeseen happens during the rooting process, you can rest easy knowing your data is safe and recoverable.

Step 1
- Charge your phone up to 50%
- Download Samsung Galaxy J7 Prime SM-G6100 USB Drivers and install them on your computer.
- Turn ON USB Debugging and Developer mode on the Samsung Galaxy phone.
Step 2
Download the Odin program to your PC
- Now Download the Odin program to your laptop or to your Computer.
- After downloading, install it and launch it.
Step 3
- take your phone and Turn OFF it by pressing the power key.
- Now press and hold the Power key + Home key + Volume down key until boot to download mode.

Step 4
- Connect your phone to your PC or laptop by using a USB data cable. it’s better to use original Data cables.
Step 5
Download the CF-Root file for Samsung Galaxy J7 Prime SM-G6100
- Download the CF Root file for Samsung Galaxy J7 Prime SM-G6100. (Yes this zip may include Odin tool again. use one of Odin.)
- CF root file is ZIP so, you have to unzip it.

Step 6
- Now press the Volume up key to continue to Download Mode.

- After tapping the Volume up key, you will able to see “Added Message” in the Odin tool’s notification box

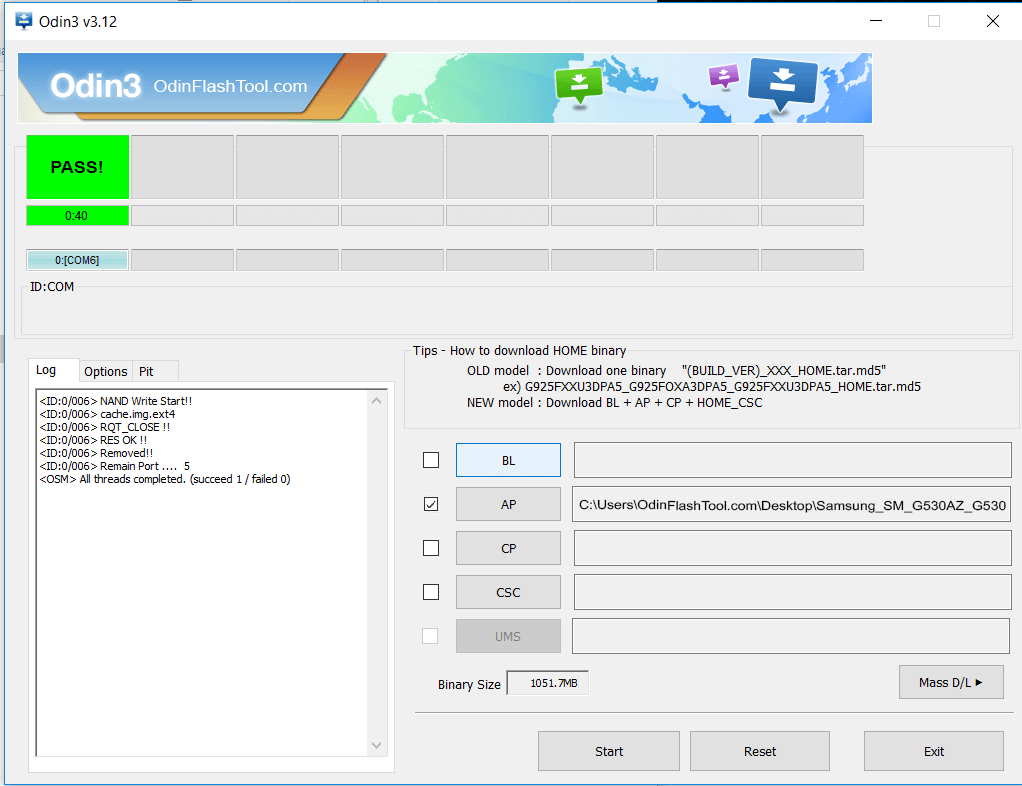
Step 7
- Click PDA / AP and browse to the downloaded CF-Root file.
- Select “Auto Reboot”

- Read More – Increase RAM SIZE after root
- Start Rooting by Clicking Start.
Step 8
- Please wait until the phone restarts automatically. and it will display a Green Pass
- The last step is to factory Reset your phone after turning on the phone
- Read more, OK I rooted. Now what next?
- Now, Congratulations you have Successfully Rooted 🙂
Check If Your Samsung Galaxy j7 Prime SM G6100 Root Is Successful
You can easily confirm if your phone has been rooted or not by following these straightforward steps. One indication of a successful root SM G6100 with Odin tool is the presence of an app called “SuperSu” on your device. If this app is visible, then it’s an indication that your phone has been rooted. However, should you still have doubts about the successful root of your Samsung Galaxy J7 Prime, there’s a fail-safe way to confirm. Simply download and use a reliable root-checker app from the Google Play Store. This app will accurately inform you whether your phone has obtained root access or not. Top 10 Rooted apps for android devices
How To Unroot Samsung SM G6100

Once you have successfully completed the process to root Samsung SM G6100, you might find that you no longer require root permissions. Perhaps the enhancements were not as beneficial as anticipated, or maybe you simply miss the comfort of the standard, unmodified operation. In this case, you have the option to unroot your Samsung Galaxy J7 Prime. The process to unroot is straightforward and requires you to follow a few simple steps. For a more detailed guide on how to reverse the rooting of your SM G6100, continue reading. Remember, the ability to unroot your device allows you to restore it to its original state, making it as good as new. More details
Conclusion
In wrapping up, the process to root SM G6100, particularly for the Samsung Galaxy J7 Prime model, opens a plethora of opportunities for users seeking enhanced control and customization options for their device. From the ability to install custom ROMs, eliminate unwanted bloatware, to boosting the device’s overall performance, the benefits are extensive.
However, it’s crucial to tackle this process with a comprehensive understanding of the involved steps and potential risks. Always ensure to secure a backup of your data prior to initiating the root process and utilize reliable software such as the Odin tool for the job. Should you determine that root permissions are no longer needed, you can effortlessly revert your device back to its unrooted state. Enjoy your journey of rooting and unleash the full potential of your Samsung Galaxy J7 Prime SM-G6100!
Frequently Asked Questions
Why is the SuperSu app crucial when you root SM G6100 and what role does it play in the root process?
“SuperSu” is a critical tool when you decide to root Samsung SM G6100, acting as a ‘superuser’ access management tool. This application is automatically installed when you root SM G6100 with the Odin tool and it gives you the ability to administer the privileges of all the apps installed on your device.
The value of SuperSu in the SM G6100 root process is immense as it allows you to control which apps on your rooted device can access the root system and which cannot. This means you have the power to prevent unauthorized apps from making potentially harmful modifications to your phone’s software.
In essence, after you root SM G6100, SuperSu ensures that you are in full control of your device’s safety and security, providing you with greater peace of mind.
What are the signs that my Samsung SM G6100 has been successfully rooted?
There are several signs that can indicate that your Samsung SM G6100 has been successfully rooted.
- Presence of SuperSu App: After successfully rooting your device with the Odin tool, the SuperSu app should be visible in your app drawer. This app manages superuser access rights for all the apps on your device that need root.
- Root Checker Applications: There are several apps available on the Google Play Store, such as Root Checker, that can verify root access. After installing and running one of these apps, it will tell you whether your device has been successfully rooted or not.
- System Updates: If you’re no longer receiving system updates from Samsung, it could be an indication that your SM G6100 root was successful.
- Increased Control and Customization: Finally, an evident sign would be the increased control and customization options available to you. If you can uninstall system apps, modify system files, or install custom ROMs, these are clear signs that your device has been rooted.
Does rooting Samsung SM G6100 void my warranty?
Yes, generally, rooting your Samsung SM G6100 does void the warranty provided by most manufacturers, including Samsung. Rooting is considered as modifying the device’s software beyond the OEM’s (Original Equipment Manufacturer) intended operation. Hence, any damage caused post rooting is not covered under the warranty.
However, it’s worth noting that the warranty can be reinstated if you unroot your device and restore it to factory settings, given no hardware damage has been done during the rooted period. It’s always recommended to be fully aware of the potential risks and implications before proceeding with the root process.
What can I do with my device after the successful root of SM G6100?
After successfully executing the root Samsung SM G6100 process, the possibilities for your Samsung Galaxy J7 Prime device are virtually limitless. Here are just a few things you can do:
- Install Custom ROMs: One of the key benefits of rooting is the ability to install custom ROMs. These can give you new features, improved performance, and even extend your battery life.
- Remove Bloatware: Rooting allows you to uninstall pre-installed apps (often referred to as bloatware) that you don’t use or want, freeing up valuable storage space.
- Modify System Files: With root access, you can modify system files to customize your device extensively, from changing boot animations to altering system UI.
- Improve Battery Performance: Various apps and custom ROMs can be installed post-rooting to optimize your device’s battery performance.
- Install Incompatible Apps: Some powerful apps require root access to work. Once you’ve rooted your device, you can install and use these applications.
- Full Device Backups: Rooting allows you to take full device backups for complete data security.
Remember, while these options can enhance your device’s functionality, they should be approached with caution as they can also potentially harm your device if mishandled. Always ensure you understand what you’re doing, or seek help from a knowledgeable source.
Are there any precautions to take before starting the root Samsung SM G6100 process?
Yes, it’s important to take several precautions before you begin the root SM G6100 process to ensure it goes smoothly and safely.
- Backup Your Data: Before you start the process, make sure you back up all important data on your phone. This includes contacts, messages, photos, and other valuable data. Rooting can potentially wipe all data from your device.
- Ensure Battery Life: Make sure your device is sufficiently charged (at least 60-70%) before you start the rooting process. If your device turns off during the process due to low battery, it may become unusable or ‘bricked’.
- Use Authentic Rooting Software: Use trusted and authentic software for the rooting process. In this case, we’re using the Odin tool which is developed by Samsung itself.
- Understand the Process: It’s crucial to fully understand the process of rooting and its implications. If done incorrectly, it can cause irreversible damage to your device.
- Warranty Void: Be aware that rooting your device will likely void your warranty. Be sure you’re comfortable with this before proceeding.
- Enable USB Debugging: On your device, enable USB debugging mode. This allows your device to communicate with your PC where the Odin tool is running.
By taking these precautions, you can help ensure the rooting process is successful and safe for your Samsung SM G6100.
Can I still receive regular updates from Samsung after rooting my device?
Once you’ve rooted your Samsung SM G6100, you might not receive official software updates from Samsung. This is because rooting modifies the system partition, which can interfere with the update process.
However, it’s worth noting that this doesn’t mean you can’t update your device at all. You can manually update your device by downloading the update file and flashing it using the Odin tool or another similar application.
Moreover, through custom ROMs – which are often updated more frequently than official firmware – you can enjoy new Android features and security patches. Remember that installing custom ROMs should be done with caution and understanding, as they can potentially harm your device if not handled properly.
In summary, while you might not receive automatic updates from Samsung after rooting, there are still ways to keep your device updated.
Equipped with a Bachelor of Information Technology (BIT) degree, Lucas Noah stands out in the digital content creation landscape. His current roles at Creative Outrank LLC and Oceana Express LLC showcase his ability to turn complex technology topics into engaging, easy-to-understand content for their websites.
Lucas specializes in writing technology guides. His work is distinguished by its clarity and relevance, making daunting tech subjects accessible and interesting to a broad audience. His guides are not just informative but are a testament to his skill in bridging the gap between technical expertise and everyday usability.
In addition to his tech-focused articles, Lucas has a keen eye for capturing the essence of his surroundings. His writing transcends technology, as he effortlessly brings to life various observations and experiences in his articles. This versatility not only demonstrates his wide-ranging interests but also his ability to connect with readers on multiple levels.
Lucas Noah’s writing is a fusion of technical acumen and a deep appreciation for the world around him, offering readers a unique and insightful perspective on both technology and life.

